Provide your primary email address and select a password and then click Submit
3. Review the Operating Agreement and then provide the information necessary to open your account.
Necessary info includes payee name, address, phone number, tax ID number, and tax classification, and let Amazon know how you want to be paid.
4. Provide your blog's URL, a description of your blog, and the kinds of products you want to list. Click Submit.
5. Depending on how you want to receive your earnings, you may need to provide your bank account information.
6. Review your information to confirm that you entered everything correctly!
To make corrections, click the Edit button. To go to the next step, click the Submit button.
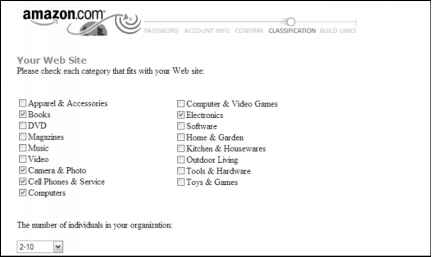
7. Check each category that your Web site falls into, as shown in Figure 14-6.
8. Select the number of employees at your company and the method you usually use to send people to Amazon.
9. Click Submit to finish.
Figure 14-6:
Use the Amazon.com Associates program to earn money from your product recommendations.
Figure 14-6:
Use the Amazon.com Associates program to earn money from your product recommendations.
Amazon takes a few days to approve your application while taking a look at the content of your Web site, but you can begin building links and sending people to Amazon from your site right away.
Putting Out a Tip Jar
Depending on what kind of business or organization yours is, a tip-jar approach might be one way to solicit monetary contributions from your readers. Some blogs use these donation appeals for a short time to fund specific activities (a shortfall in Web hosting funds or to purchase a new piece of software), and others keep the links active all the time.
Of course, if you are Sears, keep in mind your customers likely won't feel compelled to drop money in a tip jar! This strategy works best for nonprofits, educational institutions, political campaigns, and other service-oriented organizations.
Quite a few online donation services target nonprofits directly, but two popular options for nonprofit and for-profit institutions are the Amazon Honor System and PayPal Donations. Any type of organization can use both to solicit donations for any purpose.
Little Green Footballs (www.littlegreenfootballs.com/weblog), an incredibly popular political blog run by Charles Johnson, appeals to visitors for donations using both PayPal and Amazon donation services. Figure 14-7 shows links to PayPal and Amazon.
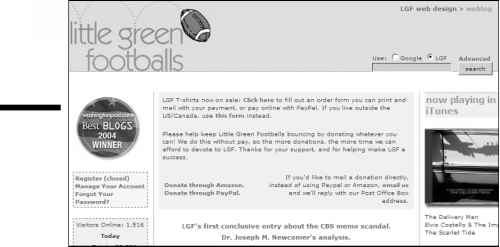
Figure 14-7:
Little Green Footballs has a donation link front and center on every page.
Figure 14-7:
Little Green Footballs has a donation link front and center on every page.
Here's how it all works:
1. You sign up with a donation collection service such as Amazon or PayPal.
2. You place HTML code and a graphic on your blog (you choose the location), and explain to your readers why they should give you money.
3. Your generous reader clicks the link and is taken to the donation collection company to complete the transaction.
4. The service provider collects and disburses funds that come in for you, keeping a percentage to cover its own costs.
You can use the tip-jar technique to ask outright for financial support — and if you are truly providing a unique and valuable service, you may just get it. For an entirely commercial organization, this idea probably won't fly unless you write a very clever appeal.
However, a for-profit business can use this technology to generate revenue for specific purposes:
^ Ask readers to make donations toward the cost of hosting an event where readers can get together and talk face-to-face. (Don't forget to attend!)
^ Ask for donations to accomplish a charitable purpose. Promise to match or even double any contributions that come in. Don't forget to follow up with information on how the money was used to generate some great good will from your readers!
^ Ask readers for donations to use as prizes for a contest in which you involve the readers.
Accepting donations with PayPal
To get started with PayPal Donations, open a Web browser, and go to www.paypal.com. Then follow these steps to sign up:
Continue reading here: Copy the provided HTML code and paste it into your blog templates
Was this article helpful?
